Having mastered some rudimentary skills in board and batten panelling, I thought I’d have a go at wainscoting. I wish I’d discovered these types of wall panelling in reverse, because wainscoting is way easier. The only thing that had originally put me off trying it was having no idea how to manage the diagonal connections (board and batten is all right angles), but I found a YouTube video that fixed that. We’re a power tool free house so everything we’ve done is easily manageable with plain old hard labour.
To make things simple, I scoured the mouldings aisle of our local Bunnings and bought:
10 x 2.4m lengths of pine moulding (it can be any type of wood really but I liked the pattern of this one and it was the right sort of width – 8mm thick and 2.3 cm wide)
A hand saw
Woodfiller
Wood glue
A plastic spatula
A 1m ruler
You would also benefit from some sort of dust sheet, and will need:
A sharp pencil
A tape measure
A spirit level
Primer
Paint of your choice (1 large 500ml and 1 small 250ml sample pot did 2 coats of 1 feature wall)
Paint brush (I like angled ones best, not too wide, not too narrow for good control)
Painters tape
And a packet of baby wipes and a roll of paper towel never come in wrong.
The first thing I decided was that I would make the room work with my wood (and my highly lacking maths ability) rather than the wood work for the room. To avoid doing any complicated sums I decided I was going to have 4 large and 4 small boxes and to make things really simple that the tall boxes were going to be 1.2m high by 60cm wide, and the small boxes were going to be 60 cm high and 60 cm wide. Why those measurements? Because the moulding lengths were 2.4m in total, so I would basically only need to halve and quarter them to get what I needed. So each tall box used 1. 5 lengths (2 halves for each side and 2 quarters for the top and bottom) of the mouldings, and each small box equated to one length of one moulding cut into quarters to make the 4 sides.
My next step was to move the bedroom furniture out of the way to measure my master bedroom wall which was 2.45m high and 3.81m long. So the sum was to take 4 x 60 (the width of each of the 4 boxes) away from the overall width of the room (3.81m-60cm×4=1.41m), then divide the remainder by 5 to work out the spacing between each box (1.41m÷5=28.2cm). So basically going width ways, each box would need to be 28.2 cm apart to fit 4 boxes equally spaced across the wall.
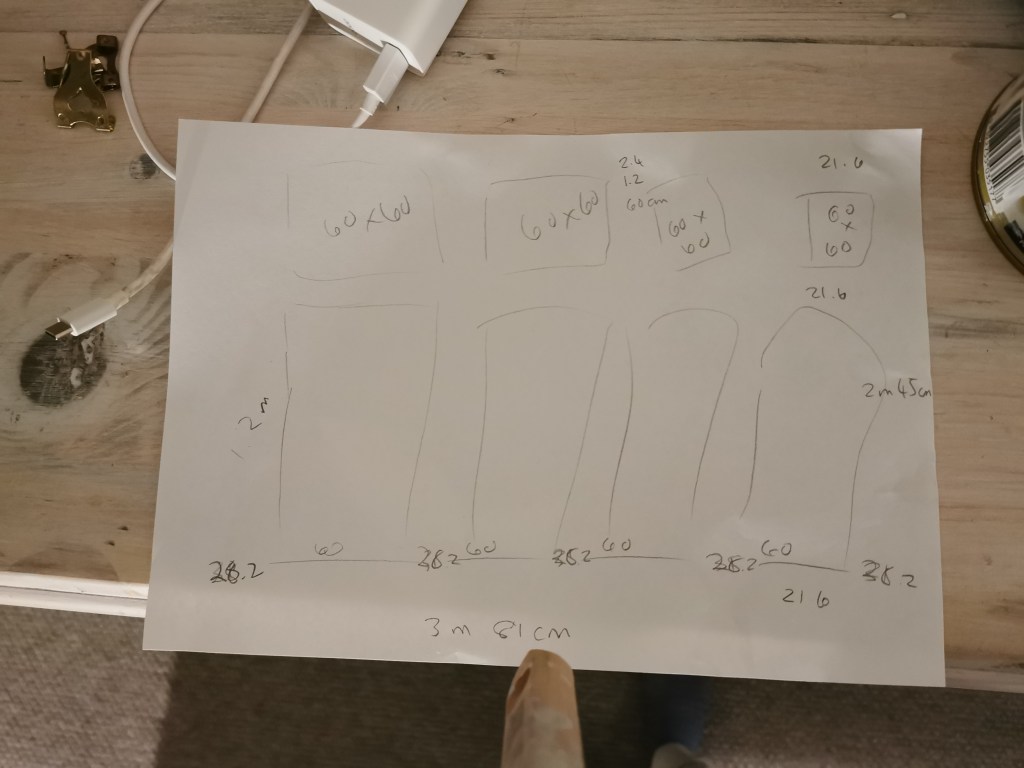
Next I needed to measure how far apart the large and small boxes would need to be apart from one another height ways. So the sum was to take the room height of 2.45m and take away 1.20m+60cm from the room height which left 65 cm. This needed to be divided by 3 to work out how far to space the boxes in relation to the height of the room. 65÷3 =21.6cm. So height wise, the large and small boxes would need to be 21.6cm apart to be equally spaced across the height of the wall. If you’re like me and you avoid numbers, these measurements would probably work for most rooms, and you could always just adjust how many boxes high and wide you go if needed. You could also flip the design and have your small boxes on the bottom and the bigger boxes on the top.
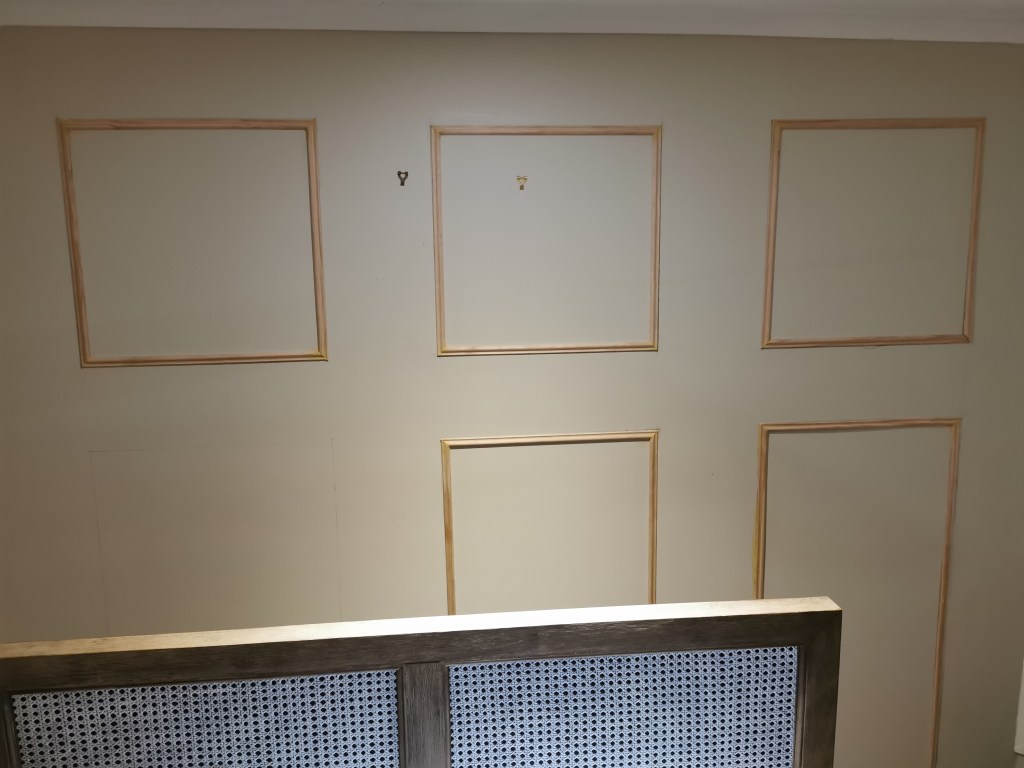
Using my spirit level, 1m ruler and a pencil I drew all the boxes onto the wall as a visual guide. Then I began to cut the wood with my hand saw into the half and quarter lengths I needed, which was pretty manageable given how thin and narrow the strips of moulding were.
The next step was the tricky part, figuring out how to mark and cut the diagonal ends of the wood so that each box would fit neatly together like a picture frame (in other words, cut a mitre joint). I happened across this very simple method, and whilst my ends weren’t as perfect fits as his were, they looked good enough once I’d smoothed them over with some wood filler. This is where a sharp pencil comes in really handy to get a greater level of accuracy.
Now you’ve done the hard part, it’s just a case of gluing your boxes onto the wall. I recommend putting all 4 pieces of wood for each box onto the wall before then taking your spirit level and easing each one into place, then using a baby wipe to wipe away the excess before it dries.
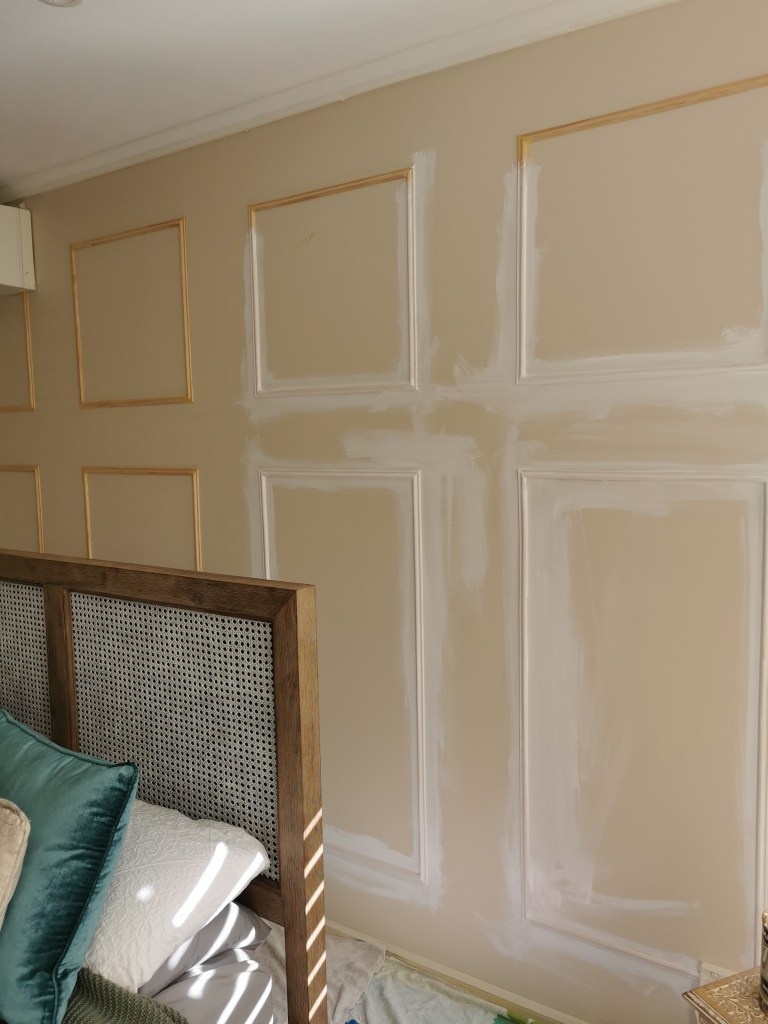
After that it’s easy street. Wait for the glue to dry, neaten the joins between each piece of moulding with wood filler. Once you’ve done that, all that’s left to do is to prime your completed boxes then paint your feature wall the colour of your choice, I usually give it 2 coats.
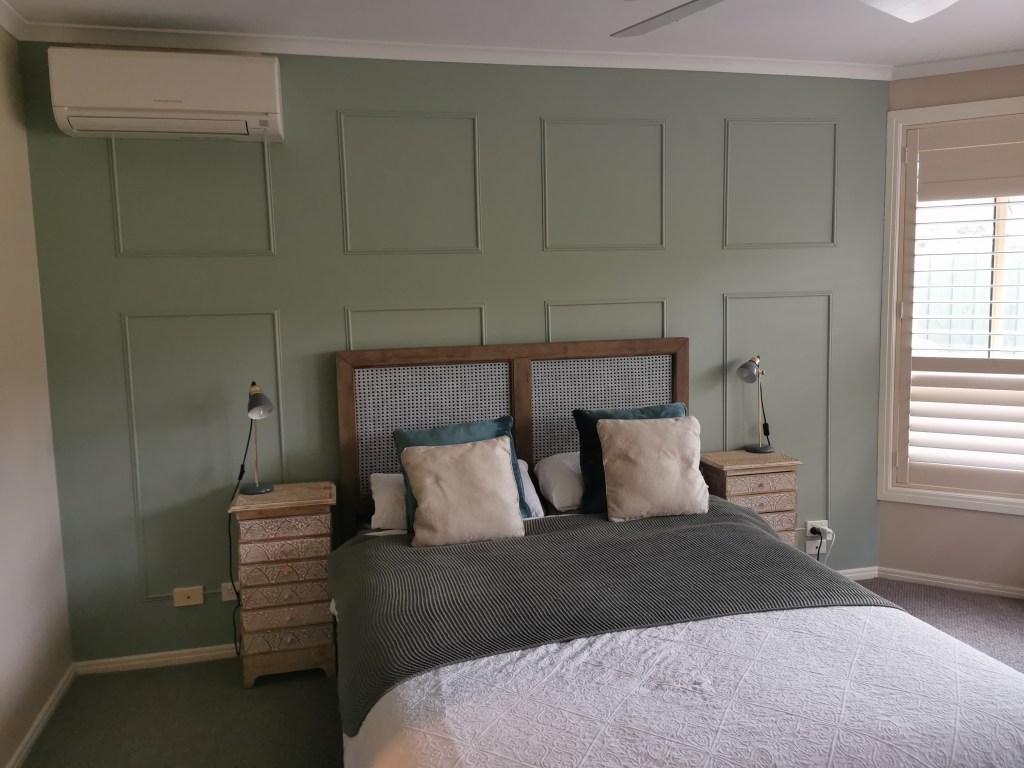
At a push you could probably get this done in a day, but more realistically across two, especially if it’s your first go. Keep in mind that the wood you buy will be imperfect so your finish will never be completely perfect but and imperfections should be pretty much unnoticeable. For instance I found as I went that some of the lengths of wood were slightly longer or shorter than 2.4m, and once it came to gluing onto the wall, some were slightly warped which occasionally made it hard to stick them to the wall as they weren’t completely flat, resulting in some frustrating moments of ends popping up at the joins, or the middle of a length of moulding refusing to sit flush. For a couple of pieces I had to just stand there for longer than I wanted to holding the wood in place whilst waiting for the glue to take effect. It was worth it though. The result transformed our room and we love it!